Easy solution for default button
There is a free component that allows you to assign a button to the “enter-pressed” client side event of input controls. If you type some text in textbox and press Enter, the form will postback, and the serverside click event of your button is fired. You don’t need to write any code, but you only need to use this control’s “DefaultButton” property. It you are a beginner programmer this could be a life saver. More about MetaBuilders DefaultButtons Control you can find at http://www.metabuilders.com/Tools/DefaultButtons.aspx
Default buttons in ASP.NET 2.0 and ASP.NET 3.5
ASP.NET 2.0 makes this problems easier and introduce a concept of a “default button”. New defaultbutton attribute can be used with <form> or <asp:panel> control. What button will be “clicked” depends of where actually cursor is and what button is chosen as a default button for form or a panel.
Here is sample HTML code that contains one form and one panel control:
<form defaultbutton=”button1″ runat=”server”>
<asp:textbox id=”textbox1″ runat=”server”/>
<asp:textbox id=”textbox2″ runat=”server”/>
<asp:button id=”button1″ text=”Button1″ runat=”server”/>
<asp:panel defaultbutton=”button2″ runat=”server”>
<asp:textbox id=”textbox3″ runat=”server”/>
<asp:button id=”button2″ runat=”server”/>
</asp:panel>
</form>
TextBox
- Enter Key in ASP.NET TextBox Control 2009.05.15
- 닷넷 에디터 게시판 사용하기 2007.11.05
Enter Key in ASP.NET TextBox Control
2009. 5. 15. 18:10
반응형
반응형
닷넷 에디터 게시판 사용하기
2007. 11. 5. 19:24
반응형
HOONS닷넷 출처
http://www.hoons.kr/Lectureview.aspx?key=Lecture&LECCATE_IDX=9&ref=1&lecture_idx=32
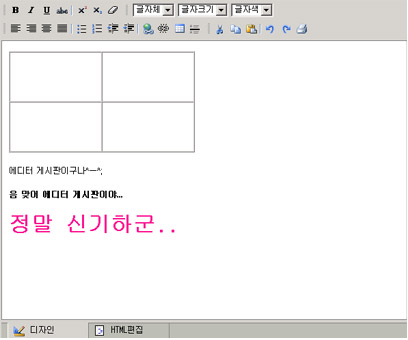 [그림 FreeTextBox]
-이미지와 스타일 다운로드 :
- DLL, ftp.inserttable.aspx 다운로드 :
1. 도구상자에서 오른쪽 마우스를 눌러보면 "항목 추가 / 제거" 라는 메뉴가 나타난다.
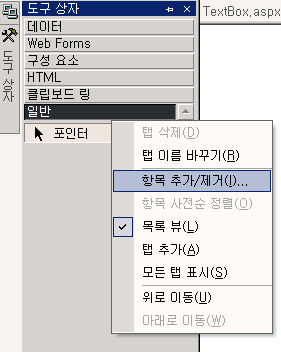
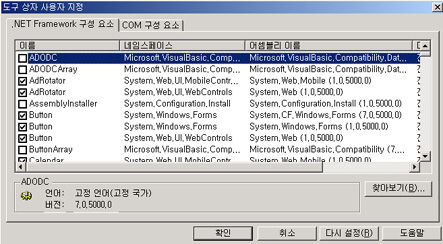
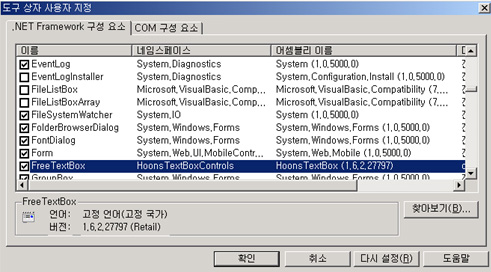
2. 항목 추가 / 삭제 목록을 열어 보면 아래와 같은 창이 뜬다. 여기서 찾아보기 버튼을 누른다.
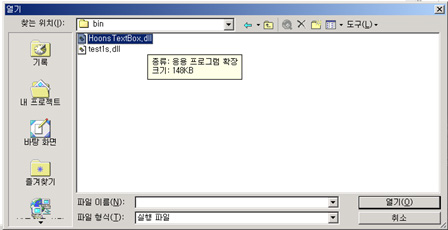
3. 아까 전에 준비했었던 bin이라는 폴더에 HoonsTextBox.dll이라는 파일을 선택
4. 선택을 하면 아래와 같이 항목에 추가가 되는것을 볼 수 있을것이다. 이제 확인 버튼을 누르고
창을 나와보자.
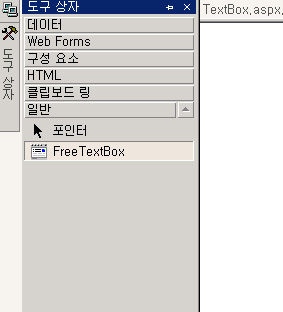
5. 이제 FreeTextBox라는 항목이 생긴다.
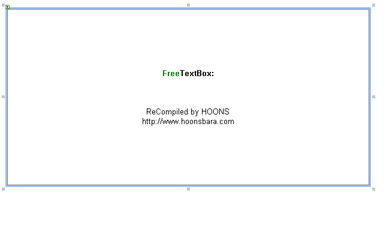
6. 아래와 같은 컨트롤이 표시가 된다. 이제 이 컨트롤들의 속성에 이미지와 스타일을
셋팅해주게 되면 되는것이다.
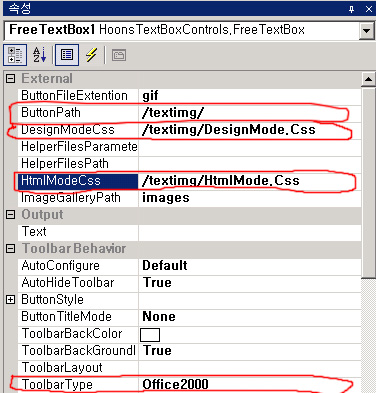
7. 텍스트 박스의 속성을 경로 부분이 있다. 아래와 같이 이미지와 스타일의 경로를 적는다.
그리고 Toolbar Type에 따라서 보드 툴색이 변하게 된다는것을 잊지말자.
8. 이제 실행을 시켜보면 에디터 게시판이 완성된것을 볼 수 있을것이다.
(ID)라는 부분의 속성을 이용해서 ID값을 편집할 수 있고, 안의 내용도
Text라는 속성으로 접근한다. 기존의 텍스트 박스와 유사하기 때문에
이용하는데 특별히 불편한 사항은 없을것이다.
http://www.hoons.kr/Lectureview.aspx?key=Lecture&LECCATE_IDX=9&ref=1&lecture_idx=32

-이미지와 스타일 다운로드 :
- DLL, ftp.inserttable.aspx 다운로드 :
1. 도구상자에서 오른쪽 마우스를 눌러보면 "항목 추가 / 제거" 라는 메뉴가 나타난다.

2. 항목 추가 / 삭제 목록을 열어 보면 아래와 같은 창이 뜬다. 여기서 찾아보기 버튼을 누른다.

3. 아까 전에 준비했었던 bin이라는 폴더에 HoonsTextBox.dll이라는 파일을 선택

4. 선택을 하면 아래와 같이 항목에 추가가 되는것을 볼 수 있을것이다. 이제 확인 버튼을 누르고
창을 나와보자.

5. 이제 FreeTextBox라는 항목이 생긴다.

6. 아래와 같은 컨트롤이 표시가 된다. 이제 이 컨트롤들의 속성에 이미지와 스타일을
셋팅해주게 되면 되는것이다.

7. 텍스트 박스의 속성을 경로 부분이 있다. 아래와 같이 이미지와 스타일의 경로를 적는다.
그리고 Toolbar Type에 따라서 보드 툴색이 변하게 된다는것을 잊지말자.

8. 이제 실행을 시켜보면 에디터 게시판이 완성된것을 볼 수 있을것이다.
(ID)라는 부분의 속성을 이용해서 ID값을 편집할 수 있고, 안의 내용도
Text라는 속성으로 접근한다. 기존의 텍스트 박스와 유사하기 때문에
이용하는데 특별히 불편한 사항은 없을것이다.
반응형
 invalid-file